 Image search results - "making" Image search results - "making" |

During July-Aug. 2007, I helped to make the Yokaichi giant kite at the annex of the Yokaichi Giant Kite Museum.where the giant kite is made. Every three years, the giant kite, flown every May in Higashi-Omi, is replaced by a new kite bearing a new design.The new kite was made during July-Aug. 2007, taking about 30 days. The kite is made by volunteers from the public under the instruction of the Yokaichi Giant Kite Preservation Society. For the first time, I helped make this giant kite which was first flown successsfully on May 25, 2008 at the annual kite festival.
|
|

Entrance to the annex and a sign indicating the day's event or work. Today, July 7, 2007, was the Noritsuke Pasting Ceremony. 八日市大凧まつり のりつけ式
|
|
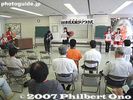
July 7, 2007: The making of the giant kite started with Noritsuke Pasting Ceremony where the new design was announced and dignitaries pasted together the first pieces of the kite paper.
|
|

Before announcing the final kite design, they announced the three best (but not winning) design entries. The public was invited to submit kite designs based on the theme of "Life" or inochi.
|
|

Twenty-six design entries were submitted this year. There was no top winner, so the final design was based on the three best designs. This design features the kanji "Yorokobu" or joyfulness. 今回のテーマは「いのち」
|
|

They introduced the three best designs. 最優秀作品はなく、3点の優秀賞作品を参考に保存会が決めた。
|
|
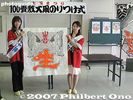
The new kite design was then announced. Called Han-jimon (判じもん), the design expresses a certain theme using word play with a pair of animals and one or two kanji characters. 八日市大凧は3年に一度図柄を変える。
|
|

The top kanji is "yorokobu" (joyfulness) which can also be read as "ki." The pair of hawks 鷹 can be read as "yo." And the bottom kanji is "sei" (living). It's "Kyosei."
|
|

Higashi-Omi mayor Nakamura Koichi explains the design. "Kyosei" 共生 means to co-exist (i.e. man and nature) or to live together harmoniously. 中村功一市長
|
|

The mayor and one of the kite design artists wear a sash and pose for a picture before proceeding with the Noritsuke Ceremony.
|
|

They used a wide brush to apply paste to the edges of a piece of kite paper.
|
|

They joined two sheets of kite paper together. This marked the first step in making the kite. The finished kite paper will consist of a few hundred washi paper sheets pasted together.
|
|
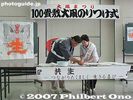
More dignitaries paste the sheets of kite paper together.
|
|

The pasted pieces are laid to dry.
|
|

We were then invited to sign our names on the kite paper.
|
|

The kite design announcement and pasting ceremony lasted an hour, after which a group photo was taken.
|
|

July 8, 2007: On the day after the pasting ceremony, the Kamitsugi or paper joining was next. 紙継ぎ
|
|

Starting at 9:30 am, members of the giant kite preservation society began pasting and joining about 400 sheets of washi paper to make the giant kite paper.
|
|

The top two rows of washi sheets already pasted together.
|
|

The size of the room almost exactly matches the size of the giant kite which is 12 meters by 13 meters or 100 tatami mats.
|
|

The paper is Mino Washi, from Gifu Prefecture. It is white, and surprisingly thin. I thought it would be thicker. Six or so sheets are stacked while slightly spread apart.
|
|

The stacked paper is put on a table where water-based paste is applied to one horizontal and one vertical paper edge.
|
|

Each person holds one edge-pasted sheet and line up to align and join the sheet. Each sheet measures about 90 cm by 60 cm. There are also half-size sheets.
|
|

Anybody can help do this. The public is invited to sign their names on a sheet and paste it to the big kite paper.
|
|

The sheets are joined in the same pattern as a brick wall. Every other row of sheets has a half sheet along the edge. Notice the autographs of people on the paper.
|
|

So the giant kite is actually made of many smaller sheets of paper joined together. Notice my "philbert" autograph on the bottom.
|
|
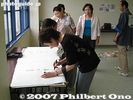
People sign their names on a washi sheet.
|
|
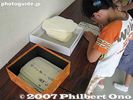
There are also smaller sheets of paper where you can write a wish and sign your name. Paste will be applied to these sheets which will be used to fasten the bamboo frame to the giant paper.
|
|

The work proceeds.
|
|
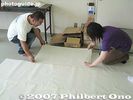
The last sheet is pasted and joined. The job was finished in 3 hours.
|
|

The giant kite paper is finished, taking up the floor space of the entire room.
|
|
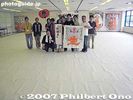
After every kite-making session, they take a picture of all the volunteer participants. It was very interesting. Anybody can participate on any day. Call the kite museum for schedule details: 0748-23-0081.
|
|

July 16, 2007: Initial sketching and vermilion painting. A sketch of the design was made with a charcoal pencil. 下絵・墨
|
|

The giant kite's main and largest kanji character "sei" is painted in vermilion.
|
|

A plastic bucket (the same kind used when you take a bath) with paint and a brush is used.
|
|
|
|
|

The red and ornage colors are painted first on the kite, while the black and gray colors are painted later.
|
|
|

Spots of white are made on purpose to give a brush stroke effect.
|
|

The "yorokobu" or "ki" kanji is also painted on the same day.
|
|

The design sketch is being completed.
|
|

Plastic pails and brushes
|
|

Vermilion paint
|
|

The sketch of the hawk is completed.
|
|

Hawk eye
|
|

Wing corner
|
|

Local cable TV station also came to cover the kite-making progress.
|
|

A brush stroke effect
|
|
|
|

"Yorokobu" or "ki"
|
|
|
|
|

Vermilion painting of "sei" is complete.
|
|

Group photo of those who worked on the kite this time. This session was 9:30 am to noon.
|
|

July 31, 2007: Bamboo frame work and picture-edge frame work. 骨組(絵骨)Hone-gumi (Ebone)
|
|

A diagonal grid of thin, rod-like bamboo criss-crossed the entire kite. They are now using string to tie the bamboo intersections.
|
|

Tied bamboo intersections. The rod-like bamboo are supported by larger pieces of bamboo.
|
|

Kite edges are lined with a thicker bamboo to which the rod-like bamboo are tied.
|
|

This intricate bamboo frame supports the kite paper so it does not flap around like normal paper.
|
|

The bamboo frame work is done after the kite design is painted.
|
|
|

Bamboo rods and sticks.
|
|

Hawk eye painted.
|
|

Wing
|
|
|
|

Besides the diagonal grid of bamboo rods, a bamboo rod is also fastened along the edges of the design where the paper will be cut out (or carved out). These bamboo rods keep the edges of the cut-out paper taut. Otherwise it would flap around in the wind.
|
|

Still more tying to do.
|
|

Tying the bamboo frame is considered to be one of the more tedious tasks, so we were rewarded with a pair of gloves with the kite design. These gloves will also give us higher priority to pull the kite during the kite festival.
|
|

Group photo. Quite a few people worked during this 3-hour afternoon session.
|
|

Aug. 5, 2007: Paper cutting 切り抜き Kiri-nuki. First they reversed the kite paper so the bottom side was up. Then they re-installed the bamboo grid as shown here.
|
|

The bamboo grid is carefully aligned with the kite design.
|
|

The bamboo grid was temporarily fixed with weights and some tape.
|
|

Intricate bamboo grid/frame fitting all shapes along the edges.
|
|
|
|

Wing portion before paper cutting.
|
|

Wing portion after paper cutting.
|
|

How they do it: First they cut along the outline of the picture leaving ample space. Then they cut it perpendicular to the edge to make paper flaps.
|
|

The paper flaps are applied with paste and then folded over the bamboo rod.
|
|

See the paper flaps pasted over the edge.
|
|
|

Almost finished. This paper cutting step took 3 days to complete.
|
|

On May 25, 2008 at the Yokaichi Giant Kite Festival, the new giant kite was flown for the first time. The wind conditions was good.
|
|
|

It had rained the night before and in the morning. The ground would've been muddy, but they spread a layer of rocks to make the ground dry. It must have been hard to pull the kite and run on these rocks.
|
|

After the flight, we could see the kite up close. A sacred sakaki tree branch adorned the back of the kite. Also many paper stickers with people's wishes were pasted on the back.
|
|
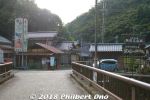
Kurotani is the name of the village (now part of Ayabe city) where they make Kurotani washi paper. This is the entrance to the small village in a valley.Kurotani Village started making washi about 800 years ago when 16 warriors of the Heike Clan defeated by the Minamoto Clan in Kyoto (Genpei War 1180–1185) fled and hid here to avoid capture. They and the local farmers made a living in summer by growing rice, but since there was nothing to do in winter, they thought of making washi paper. Washi can only be made in winter since it requires cold water.
|
|
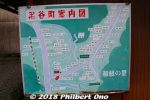
Kurotani Washi-no-Sato Japanese papermaking village in Ayabe, Kyoto.Once upon a time, there were a number of washi paper makers in northern Kyoto like Tango washi and Tanba washi, but now there's only one traditional maker that has survived called Kurotani washi. They work here in the small Kurotani Valley.
|
|
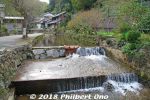
Kurotani village was blessed with this clean Kurotani River, essential for papermaking. Kurotani washi is quite famous now, even overseas.
|
|
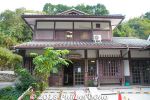
Kurotani village has this Kurotani Washi Kaikan gift shop (黒谷和紙会館). Kurotani is not touristy because it's not convenient to get here.
|
|
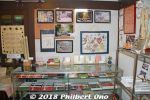
Inside Kurotani Washi Kaikan gift shop.
|
|
|
|
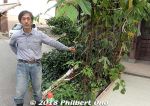
Kurotani washi mainly uses kozo or mitsumata mulberry plants as the raw material. This is our Kurotani washi guide showing us the kozo plants that can grow to three meters high.They are harvested in autumn by cutting the trunks or branches. They grow kozo mulberry near Ayabe Station. Kozo is called "kago" in Kurotani.
|
|
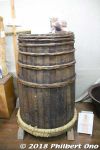
To make the paper fibers for washi, there are many laborious steps. After the kozo branches are cut in even lengths, they are stuffed in a barrel (koshiki) like this and placed over a boiling and steaming iron pot for three to four hours to soften the brown bark.
|
|
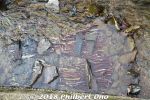
While the kozo branches are still hot, elderly ladies twist and strip off the brown bark (kuro-kawa 黒皮). The bark is dried, then soaked in river water like here.
|
|
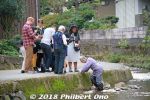
While soaking, the kozo bark is also kneaded by human feet to soften it. The water is cold, and it's a traditional job for the grandmas.
|
|
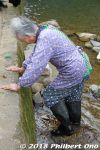
We just happened to come across her in the river kneadking the brown bark. How lucky we were.
|
|

She's Horie Sayo, 86 years old, been doing it since her teens.
|
|
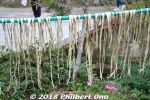
The brown kozo bark is shaved and scraped with a knife by hand to remove the brown bark skin and other blemishes. Then the becomes thin, white strips that are dried in the sun. (shiro-kawa 白皮)
|
|
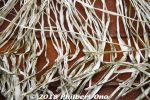
White kozo bark strips drying. These will then be mashed and beaten into fibrous globs. Preparing the kozo fibers from the bark is the most laborious and time-consuming part of washi making.
|
|
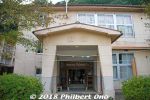
Also visited Kurotani Washi Kougei No Sato (Kurotani Washi Craft Village 黒谷和紙 工芸の里) a 20-min. car ride away.They were using an old elementary school.
|
|
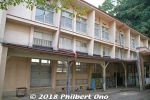
They use the 1st floor for making paper, while the second floor are washi exhibition rooms.
|
|
|
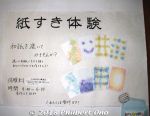
They offer washi papermaking lessons for ¥1,300 including admission.
|
|
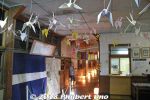
Entrance hall with origami cranes made of Kurotani washi. It really looks like an old school.
|
|
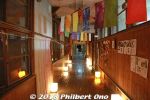
Corridor to rooms.
|
|
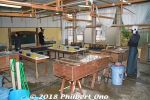
Washi papermaking room where we tried making Kurotani washi paper (postcards).
|
|
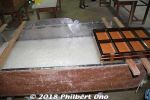
A large vat (sukifune) filled with washi fibers floating evenly in the water. The fibers are mixed in with a plant-based adhesive so they don't sink to the bottom and they also cling together to make the paper. A wooden mold (keta 桁) to make eight postcards on the right. Kurotani washi bills itself as Japan's strongest paper. In the 1920s, Kurotani washi was tested for strength and was declared the strongest washi in Japan. I was told Kurotani's kozo has longer fibers than other species so the paper is stronger.
|
|
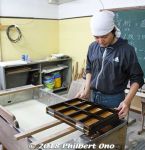
Our instructor first showed us how it was done. He used a mold to make eight washi postcards.
|
|

About sugeta.
|
|
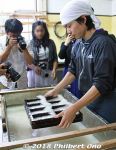
Dump the postcard mold into the vat and swish it left/right and forward/back evenly.
|
|

Takes three years to learn how to make washi paper with a mold. Ten years to become an expert. But we did it in a minute or two... Just dip the mold into the fibrous water, and swish it to the left/right and forward/back.
|
|

The postcards looked quite thick out of the mold, but they would get much thinner when dried.
|
|
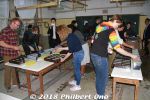
Afterward, we could decorate our postcards with colored ink/fibers.
|
|
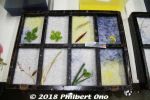
A few people even embedded leaves.
|
|
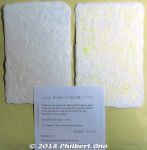
They later sent us our postcards. Mine came out okay.
|
|
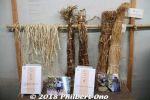
This shows how they typically hang and dry the white strips and bark strips.
|
|
|
|
|
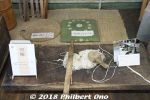
Later, it is mashed/beaten in a stone mortar.
|
|
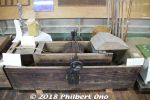
Then it goes through a mechanical beater for 10 min. to become a wet, fibrous mass. They also make and add a plant-based adhesive. Here's a good video (in Japanese) showing how they do it (the woman we saw in the river also appears in this video): https://youtu.be/-3ws9DlPVHo?t=425
|
|
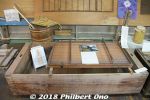
The vat and mold to make paper.
|
|

Kami-suki is what everyone can experience.
|
|
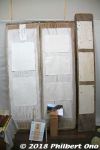
The washi shets are dried on wooden boards.
|
|
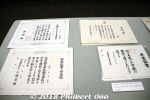
Local public schools have their kids make their diplomas with Kurotani washi.
|
|
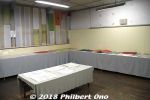
Second floor in former classrooms are exhibition rooms.
|
|
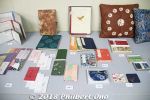
Kurotani washi has long fibers, making it very strong and durable. It has many uses such as umbrellas, shoji paper sliding doors, and packaging.
|
|
|
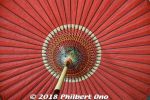
Kurotani washi can even be used for umbrellas.
|
|
|
|
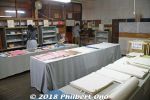
Gift shop.
|
|
|
|
|
|
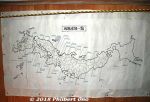
Places in Japan where washi is made.https://kurotaniwashi.kyoto
English: https://kurotaniwashi.kyoto/?page_id=450
|
|
|
|
|
|